Showing posts with label tutorial. Show all posts

DIY Staircase Makeover Tutorial With Cap A Tread Stair Covers

This post is sponsored by The Home Depot.

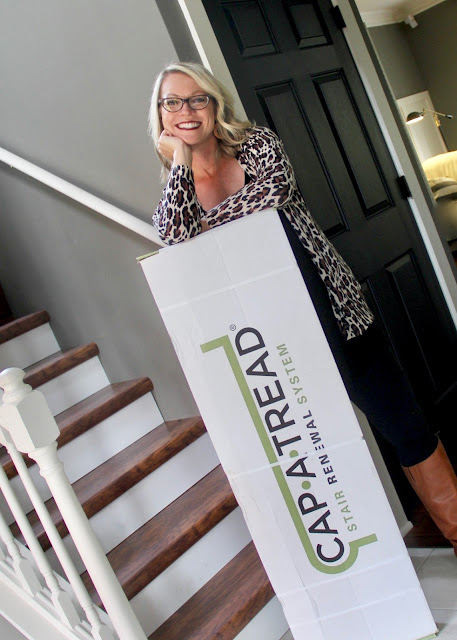
Today is the day I get to share an exciting project I've been working on behind the scenes. A staircase makeover has been on my mind for a while, and when I came across Cap A Tread Laminate Stair Covers at The Home Depot, I was inspired to get started. I was able to handle this project DIY style, with the assistance of my two teenage boys. It was really fun to work on it together and I loved sharing my passion for home projects with them. 

Before I share the process and all the tricks I learned during this project, let me show you the dramatic transformation...

(Before)


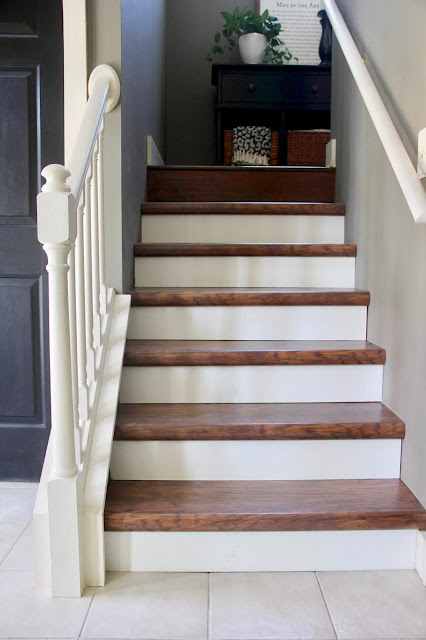
(After)


Choosing The Right Color

Cap A Tread Stair Covers are available in tons of different colors. This makes it easy to find a color that coordinates with your other wood or laminate floors.


My local Home Depot did not carry all of the available stair tread colors in-store (most needed to be ordered) so I had to get a little creative to find the right shade. I realized they did carry many of the transition pieces (T Moldings, Stair Nosing) in various colors so I purchased a few and brought them home to use as color samples. Once I had the color samples narrowed down to two, I ordered two stairs to be sure I had the perfect color locked down before placing the entire order. When the two "sample stairs" came in, it was instantly obvious to me which one was my favorite... Highland Hickory. It's almost a perfect match to the floors in my living room and dining room which are both adjacent to my foyer. I had the option of purchasing risers in the same Highland Hickory finish, but I decided to go with the white-primed risers so I could paint them cream to match my trim for contrast. 


Researching the Process

Before getting started, I did some quick research on the installation process. I found two videos that were extremely helpful. They spelled each step out so well, that after watching them I was 100% sure I could handle this project. I'm NOT a professional Carpenter, Builder or Contractor, but I do have basic knowledge of the tools needed for this project and a huge DIY spirit. The first video I watched is THIS ONE by THE HOME DEPOT and the second video is THIS ONE by ZAMMA. I highly recommend watching both of these videos in their entirety. They provide important info on measuring, cutting and installing this product. 


Measuring and Ordering 

There are two types of Cap A Tread stair tread covers; Type 1 and Type 2. 
Standard Cap A Tread (Type 1) covers stairs treads that are 1" or less thick. If the thickness of your stair tread is 1.125" to 1.750" thick, you will need to order Type 2 Cap A Tread. I pulled the carpet and padding back an inconspicuous corner and measured the plywood tread underneath. My stairs required Type 2 Cap A Treads. 

The Cap A Treads Stair Treads and The Cap A Tread Risers are both available in different lengths. The easiest way to make sure you are ordering the correct size is to measure your stairs and take those measurements with you when you place the order at your local Home Depot. My Associate was very helpful and even made a great suggestion to order a couple more pieces than I actually needed just in case I made any cutting errors (which I did make one). Just make sure you are aware of any potential restocking fees as this product may be considered a special order. 


Demolition and Site Prep

This is the part where I brought my boys on board. They handled the demo and the prep for me like absolute pros. I introduced them to these tools... a hammer, a scraper, pliers, a flat screw driver and safety glasses.


Together, using these tools, they removed the old carpet and pad along with the tack strip, staples, and nails from the plywood treads and risers. 


They also vacuumed thoroughly, a very important step to ensure glue adhesion. 


Cap A Tread Installation

The tools/supplies needed to install the Cap A Tread system were; a table saw, a sliding compound miter saw, Heavy Duty Liquid Nails, a tape measure, a T Bevel, and a brad nailer with nails (if you wish to nail your boards as they suggest in the Zamma video). 

According to the instructions, the installation of the Cap A Tread System needs to start on the bottom and go riser, tread, riser, tread, riser, tread, etc. until the entire staircase is complete. It's recommended that each riser and each stair is individually measured and cut, piece by piece, as they are installed. This is because most staircases are not 100% plumb, nor will every stair riser and ever stair tread be the exact same length. 

I created a video that illustrates the process I used of measuring, cutting and installing the stair risers and treads. You will notice in the video when I measured the treads, I used a T Bevel tool in the corner of each tread. This is because my staircase was not plumb and this tool helped me find the angles needed to get a nice tight fight with little to no gaps. 


Check out my installation video here:


Here's a quick recap of the steps...

Measured height and width of riser.

Transfered measurements onto riser.

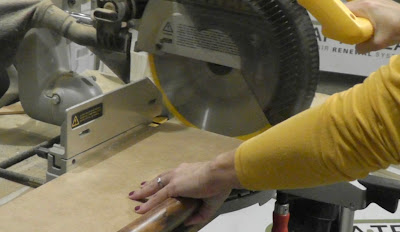
Cut riser to length using the miter saw. 

 Cut riser to height using the table saw. 

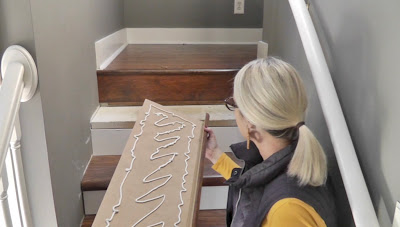
Applied Heavy Duty Liquid Nails to back of riser.

Pushed riser in place. 

 Measured width and depth of tread.

Found angles in each corner using a T Bevel. 

Applied T Bevel angles to tread cuts using the miter saw. 

Cut treads to depth using the table saw.

Applied Heavy Duty Liquid Nails to tread. 

Pushed tread into place. (You can secure with brad nails in the very back if desired). 


Allowed glue to cure, then touched up my gray wall paint...


I finished my project by painting the risers in the same custom cream color that I used on the trim throughout my home.


Here it is, all done!


Here's another look at the before and after side by side. This project has made a huge difference in our small foyer!


Thanks for stopping by and letting me share this project with you!


Before you go, did you check out my E Design Service? My Online Design Service is an affordable way to achieve a professional, custom, unique and cohesive design that suits your style preferences and budget. Please email me at TheYellowCapeCod@yahoo.com if you have any questions, or make your reservation here. 


This post is sponsored by The Home Depot.


How To Make An Impressive Indoor Centerpiece Using Outdoor Decor

Few things make me happier than coming home to a beautiful fresh floral arrangement. Whether it's a bouquet from my hubby, a vase filled with flowers I picked up while at the supermarket or just a simple bunch of fresh clippings from the yard. A fresh floral arrangement brings life and energy to the home and makes any space feel special. 


My favorite place to display fresh flowers is in our dining room. It's the first space you see upon entering the foyer. This week, I created what has to be my favorite fresh floral centerpiece ever for our dining room table. It started with a pair of Outdoor Covered Pillar Candleholders (Pawn Covered Pillar Candleholders from Bombay. I used one large and small. They are sold separately and available at Kolhs). 


These gorgeous candle holders are actually intended for outdoor use, but when I saw them I immediately pictured them inside on our table.  Merchandise that is intended for outdoor use is usually large in scale. When brought inside, pieces like this make a big statement. Especially in a small space like my dining room. They look really cool all on their own, but I decided to use them as vases to create an inexpensive, but quite impressive fresh floral centerpiece. The tops are removable and the inside where the candle is supposed to go can easily be used as a vessel.


I grabbed two bouquets of flowers from the supermarket and a package of wet foam. 


I cut the foam in half, wet it and stuck one half in each statue. 


Then, I trimmed the flowers down and stuck them in the foam one at a time. I made sure they were evenly spaced and coming out at all different angles. 


After placing the flowers in the vase, there were large gaps and empty areas that needed filling. I grabbed my hedge clippers and headed outside to the front yard. I clipped a few stems from my hydrangea and brought them inside.


I used the hydrangea to fill in the areas that looked bare. Then, using a few extra long stems, I gave the arrangements a little height by sticking them in the top. I stuck a few curved stems in the bottom for a cascading effect. 


The round statue tops look really cool sitting on the table next to the arrangement and create a cool vignette style centerpiece. 


Once the flowers die, I can either refresh the arrangement with a new pack of grocery store flowers and more yard clippings, or use them as candle holders, or simply leave the statues empty.  


Either way, I have a large, eye-catching centerpiece that anchors the dining room table. 


The Pawn Candle Holders were designed in Michigan and distributed by a Michigan based family business which has been based here for over 50 years. Since I am smitten with the mitten, it really makes me happy to know they were designed and distributed locally. Here is a link where these candleholders and other Bombay outdoor furnishings and accessories are available at Kohls. 


*I'm now available for new online design projects! Please click here for more info.
*I received the Pawn Candleholders free of charge to facilitate this post.

High Impact, 5 Minute Fall Centerpiece In a Tote~Tutorial

Now that things have settled down (a little) I'm excited to share some of the fun "projects" I've been working on. To start, I spent a weekend in Davisburg, Michigan for The Makers and Doers Festival (formally called A Weekend In The Country).  I held a series of live workshops, including one dedicated to creating simple, budget friendly, fall centerpieces.  Each centerpiece was made of produce/flowers from the grocery store, clippings from the yard and things most of us already have laying around the house. 


My "Five Minute Fall Centerpiece-in-a-Tote", was the most popular among the attendees. It's very easy to put together and makes a big statement.  Especially if you make two.  Using grocery store flowers and a basket or tote you already have around the house makes it inexpensive enough that even making a pair is still easy on the wallet. Since it was such a hit at the festival, I thought I'd share the tutorial here as well.  


What you will need:
-A small, inexpensive vase
-An attractive storage tote or basket (my striped storage tote came from Hobby Lobby)
 -A dinner plate 
-A large bouquet (or two small bouquets) of grocery store flowers 
-Curly willow branches or branches from your backyard
-A handful of plastic grocery bags


The simple steps:
1. The first step is to place the dinner plate in the bottom of the basket or tote.  This provides a nice sturdy, level base for the centerpiece and will also catch any incidental water drips.


2.  Next, fill your vase with water (and any vitamins included in your flower bouquet).  Then place inside the tote, resting it on top of the dinner plate.  


3. To help keep the vase from tipping over and to keep the tote looking full and plump, plastic grocery bags tucked in around the vase will do the trick. 


4. The next step is to add your flowers.  I simply unwrap the flowers, trim them to the height of my vase and set them into the vase.  If you would like to take the bouquet and re-arrange the flowers, you could, but most of the time I find it's not necessary.  Sometimes, if the bouquet is on the small side I will use two bouquets.   


5.  The last step is to add a little height to the arrangement.  I used curly willow branches that I found in my grocery store floral dept.  These can be used over and over again.  If you can't find curly willow branches at your grocery store, branches from a tree or bush in your backyard could work also.  


What makes this arrangement such a high impact element is the size and height of the arrangement, the eye-catching, black and white stripes and the interesting texture of the canvas tote.  If you don't have a canvas tote, you could use woven basket (like I did with this centerpiece).  Baskets are also a great way to create an eye-catching piece, and most of us have one available. 


Taking advantage of the grocery store floral department is a convenient and budget friendly way to incorporate fresh flowers in your home. Whether your entertaining, decorating for the seasons or just need a little visual pick-me-up.  Last year, I made a large fall centerpiece using a similar approach with flowers from the front yard (click here for details).  

Better get back to the design studio.  Thanks for stopping by!


For information on my affordable online design service please click here.
All photos credit to Sarah Macklem of The Yellow Cape Cod, unless otherwise marked. 
Related Posts Plugin for WordPress, Blogger...
 
SITE DESIGN BY DESIGNER BLOGS