
This post is sponsored by The Home Depot.
Happy Holidays, everyone! Tomorrow I'm delivering a really neat gift that I made for a local veteran. You may remember in the fall I shared the experience I had working with Team Depot on a home makeover for a special veteran in Detroit (click here if you missed it). Well, not only did we help our veteran, Ken, and his wife (also a veteran), Erin, out with some outdoor improvements, but Team Depot is also working on a makeover inside their home as well. They asked me to make a custom wall art piece that could be given to Ken and Erin for Christmas.
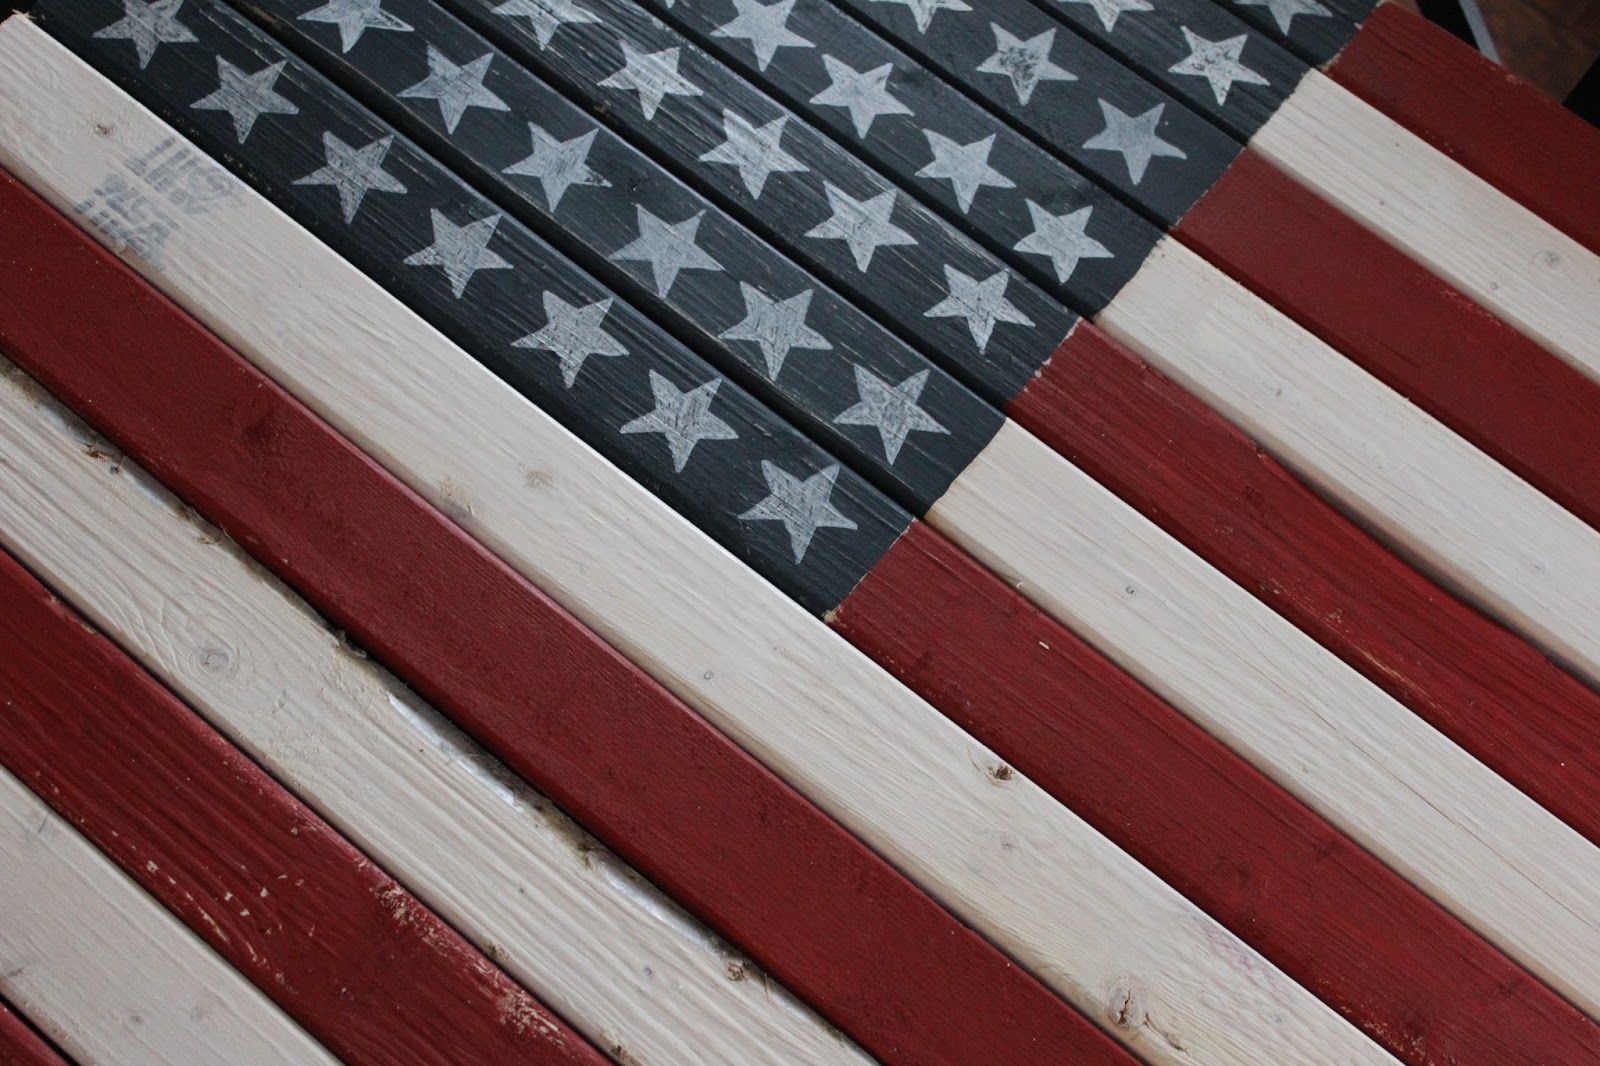
I wanted this piece to be really special and unique, something Ken and Erin would love to display. I knew I was pretty safe with making them something patriotic, so I got to work making a gigantic rustic wooden American flag…

This project was super budget friendly and came together easily. I absolutely love the way it turned out. It's very large and is the perfect statement piece for any blank wall that needs something cool. It has a ton of texture and personality. Not to mention the graphic pattern from the stars and stripes will create an eye-catching focal point in their space.
Here is what I used to create this DIY Rustic Flag:
One Bundle of Furring Strip Boards (the more distressed the better)
Red Paint
Blue Paint
Antique White Wood Stain
White Paint Marker
Sanding Block
Pencil
Transfer Paper (Tracing Paper)
Level
Table Saw
AirStrike Nail Gun Loaded with 1.5" Nails
Paint Brushes

Choosing the right paint colors was a little tricky. I wanted to use the true colors of the American Flag, while still giving this art piece a rustic look and ensuring that it would blend well with their home decor. I ended up using Glidden's Rusty Red and Krimson Lake Blue. For the white, instead of using paint, I used Antique White Wood Stain. This allowed the wood grain to show through which added to the rustic look of the finished piece.

**Please note that I accidentally added an extra white stripe at the bottom during the building process. The extra board was supposed to have been discarded, in my excitement I got carried away and attached it in error. Thankfully, it was caught, and I was able to remove it before delivering it to our Veteran.
Here are the simple steps...
I started by painting the end of seven furring strips with the navy paint.

The rest of each board was then painted red or white.

After the paint was dry, I cut the boards in half (using my table saw) and began to layout the flag design. As you can see, some of the boards had more imperfections than others. That is what gave this piece so much interest and character. When I laid out my design, I made sure I spread out the distressed pieces so they weren't all grouped together. I also decided to use the side of the board that had the stamp on it for a couple of the white stripes for even more personality.

Once my design was mapped out I flipped the boards over and secured them together by placing three furring strips vertically to the back of the boards and using the Air Strike nail gun to nail each board into place.
**Please don't forget to discard the extra board. This is the point in the process where I did not do that and ended up with an extra white stripe.

Once the boards were all secured, I flipped the flag back over and began working on the stars.
To get them just right, I created a template by printing a row of stars from my computer. Then I traced them onto the flag using transfer paper from the craft store. Every once in a while, I used my level to make sure they were nice and straight. After the stars were traced, I filled the outlines in with a white paint marker.

Once the paint was completely dry, I gave the entire piece a light sanding with a sanding block. I concentrated on the edges to allow the wood to show through giving the flag an authentic, time worn look.

When I was finished with the sanding, I cleaned the flag with a damp rag to remove all the sanding dust. My original plan was to give it a coat of poly-urathane to finish it off, but I decided that I loved the flat, raw finish it had without the poly. So I called it finished.
This was a really fun project for many reasons. When I began collecting my supplies, I brought them all into the dining room where I could work on the project inside the house instead of out in my DIY studio (the garage). This would allow me to work on it next to the Christmas tree with holiday music playing, Christmas cookies baking and my little buddy, Murphie, in his Christmas sweater at my feet. A lot of holiday spirit went in to the creation of this gift.
Working on this project inside also allowed me to take my time making it over the weekend while spending time with my family. The kids watched it come together which started a lot of conversations about how important it is to show our veterans how much we appreciate their sacrifices for our freedom. **My embarassing error with adding the extra stripe was also a good teaching moment for them.
Joining forces with Team Depot has been a wonderful experience for me personally through the years, but also something I am proud to share with my kids. To learn more about Team Depot, please visit their website, or follow along with them on Facebook.

One detail I would like to point out is that using furring strips to create this flag was not only a budget friendly option, but check out the detail in the imperfections of each board. Firring strips are a little rough to handle (it's a good idea to wear gloves to avoid splinters) but once the art piece is together, the rough texture and uneven lines is what makes it so cool!

I can't wait to deliver this flag to Ken and Erin tomorrow. I'll be back to share the experience here with you on the blog. I will also be posting live from the delivery on my social channels so be sure to watch for that!
If you make one of these for yourself, I would love to see it! Please feel free to upload your pics to my facebook page, tag me on instagram or email them to TheYellowCapeCod@yahoo.com. I know I'll be making another one, my husband loved it and asked if I would make one for him!
Hope you are enjoying this Christmas season. Thanks for stopping by!

 "Pin on Pinterest")


Online Design Services are now available. Please click here for details.
*I acknowledge that The Home Depot Foundation is partnering with me to participate in this Celebration of Service program (the “Program”). As a part of the Program, I am receiving compensation for the purpose of promoting The Home Depot Foundation and its non-profit partners. All expressed opinions and experiences are my own words. My post complies with the Word Of Mouth Marketing Association (WOMMA) Ethics Code and applicable Federal Trade Commission guidelines.


I hate that my first comment on one of your posts is negative, but it is actually 'furring strips' not 'firring strips'.
ReplyDeleteHi Anonymous, I have always referred to them as Firring Strips, but since you brought it to my attention, I did a little research and learned that "Firring" is the UK term ("Furring" is the American term). Thanks for the tip! Sarah
DeleteIt really is the perfect present, and an amazing focal point! Just one tiny thing, and I feel bad for even mentioning it because you may have added it on purpose.. :-/ but the flag has 13 stripes, not 14. That white stripe at the bottom doesn't belong!
ReplyDeleteHi cdhinteriordesigns, Please don't feel bad mentioning it. I appreciate you bringing that up! I accidentally added the white stripe at the bottom during the building process, I was supposed to discard it and got carried away! Luckily someone else also noticed it and let me know right away and I was able to remove it before I delivered it.
DeleteWow. The flag looks amazing. Great Job. The fitting strips do make it look more distressed and imperfect, which makes it look perfect! I'm sue they will absolutely Love it. Great job. God Bless!
ReplyDeleteThanks Stacy!
DeleteOops just as I pressed send I realized I put FITTING strips. LoL. I meant Firring. obvs. Hehe. Thanks!
ReplyDeleteI think there are 13 stripes on the american flag not 14, other than that it is very nice.
ReplyDeleteHi Linda, You are correct. I have since removed the white stripe at the bottom. I appreciate you bringing it to my attention. I'm embarrassed by the mistake!
DeleteMerry Christmas to all, even the grinches. Art is subjective and this was a wonderful tribute. Thanks Sarah!
ReplyDeleteThank you. Merry Christmas to you as well!!
ReplyDeleteThere are only 49 stars on this flag.
ReplyDeleteAnonymous, there are 50 stars, I appreciate you double checking that for me though.
DeleteThis comment has been removed by the author.
ReplyDelete